Master Your Professional Photography Lighting Setup Today

Building your first professional lighting setup is a big step. It’s not just about spending money; it's about making smart choices that give you reliable, beautiful results for years to come. Forget the idea that you need the most expensive gear on the market. The real secret is investing in the right tools—like one powerful key light and a quality modifier—that fit your style and can grow with you.
Building Your First Professional Lighting Kit
Diving into professional lighting can feel like you're trying to solve a puzzle with a million pieces. There are so many brands, specs, and opinions out there. But let's simplify it. Your first big decision comes down to your primary light source: are you a strobe person or a continuous light person?
Strobes, also known as flashes, are the absolute workhorses of still photography, and for good reason. They unleash a massive burst of light in a tiny fraction of a second, which is perfect for freezing motion with tack-sharp clarity. That raw power also lets you completely overpower ambient light—even the bright midday sun. This gives you total creative control, whether you're shooting in a controlled studio or out on a chaotic location.
On the other hand, you have continuous lights, which these days are almost always LEDs. As the name implies, they stay on. This gives you a direct, real-time view of how the light is shaping your subject. That “what you see is what you get” (WYSIWYG) approach is a game-changer for anyone still learning to sculpt with light. It’s also non-negotiable for hybrid shooters who need to seamlessly switch between photo and video.
Strobe vs. Continuous Lighting At a Glance
So, which one is right for you? It's not about which is universally "better," but which is the best tool for the job you need to do. A portrait photographer has very different needs than a food photographer, who has different needs than a videographer.
This table breaks down the core differences to help you decide.
| Feature | Strobe (Flash) | Continuous Light (e.g., LED) | Best For |
|---|---|---|---|
| Power Output | Very high burst of power. | Lower, consistent power. | Strobes are ideal for overpowering sunlight and large scenes. |
| Motion | Excellent at freezing motion. | Can cause motion blur at slow shutter speeds. | Strobes are the go-to for action, fashion, and crisp portraits. |
| Real-Time Preview | No, you see the result after the shot. | Yes, "what you see is what you get." | Continuous lights are great for beginners and precise setups. |
| Video Use | No, cannot be used for video. | Yes, designed for flicker-free video. | Continuous lights are essential for videographers and hybrid shooters. |
| Heat Output | Low, since it only fires briefly. | Can get warm with prolonged use. | Strobes are more comfortable for subjects during long shoots. |
| Learning Curve | Steeper; requires understanding flash sync. | More intuitive for learning light placement. | Continuous lights offer a more straightforward learning experience. |
Ultimately, your choice depends on your primary focus. Portrait and fashion photographers almost always lean on strobes for their power and ability to create dramatic, high-contrast images. Product and food photographers can go either way. Strobes deliver consistency shot after shot, while continuous lights make it easier to meticulously craft tiny highlights and shadows. For anyone shooting video, however, the choice is made for you—high-quality continuous lights are a must.
This infographic gives you a simple visual guide for picking your foundational gear based on where you shoot most often.
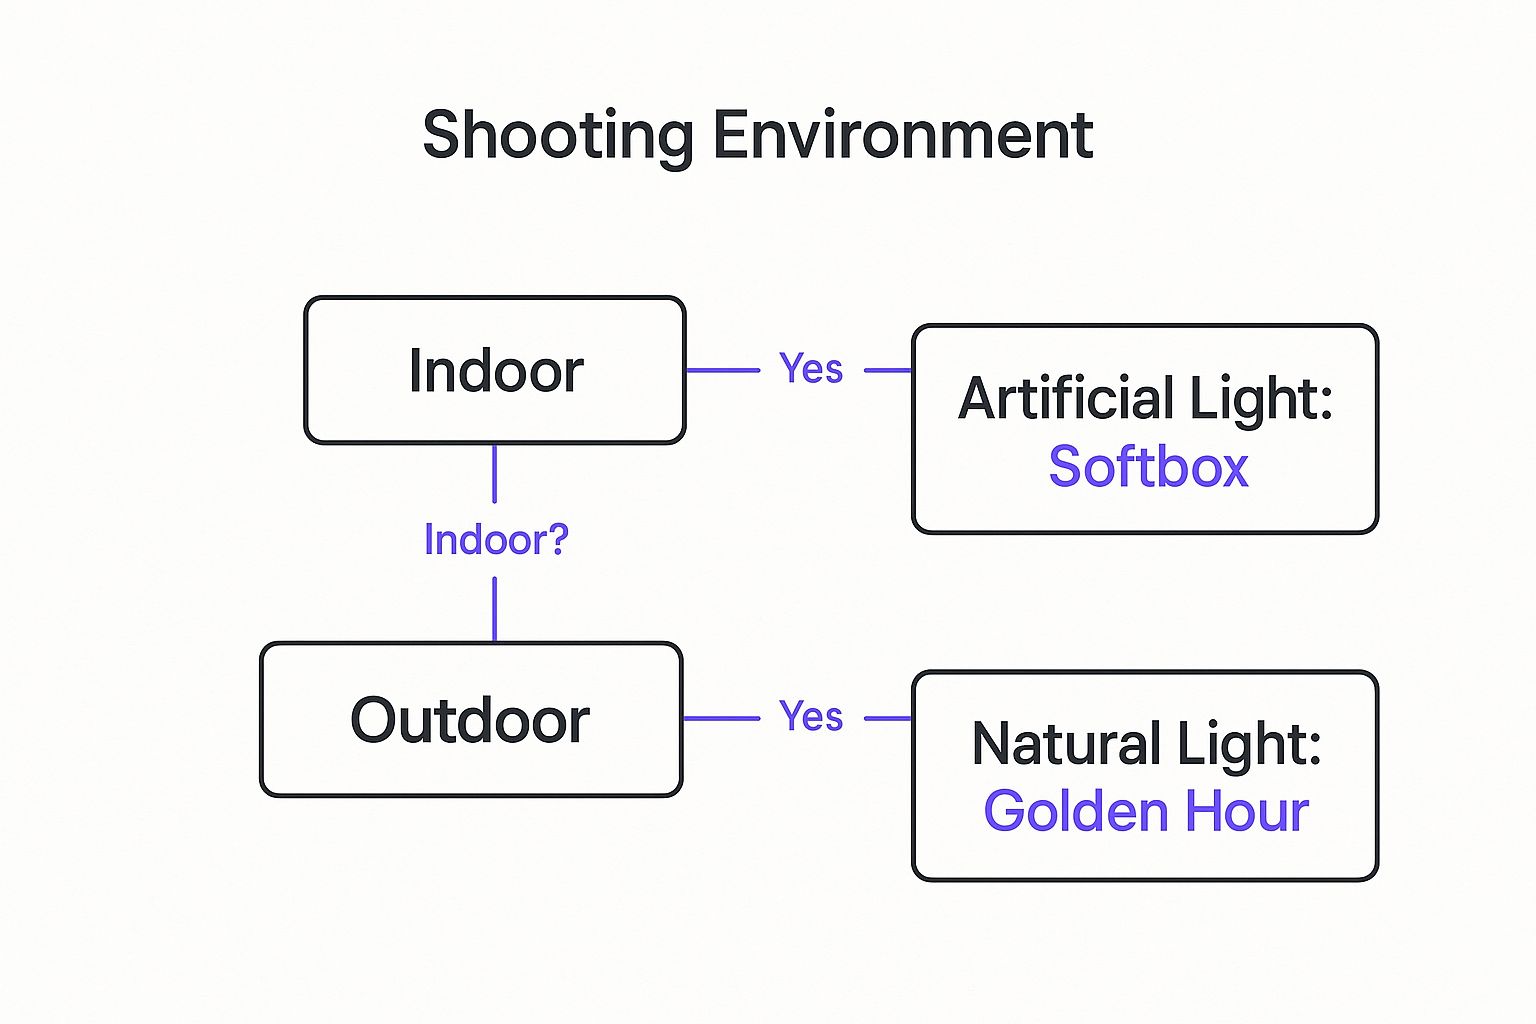
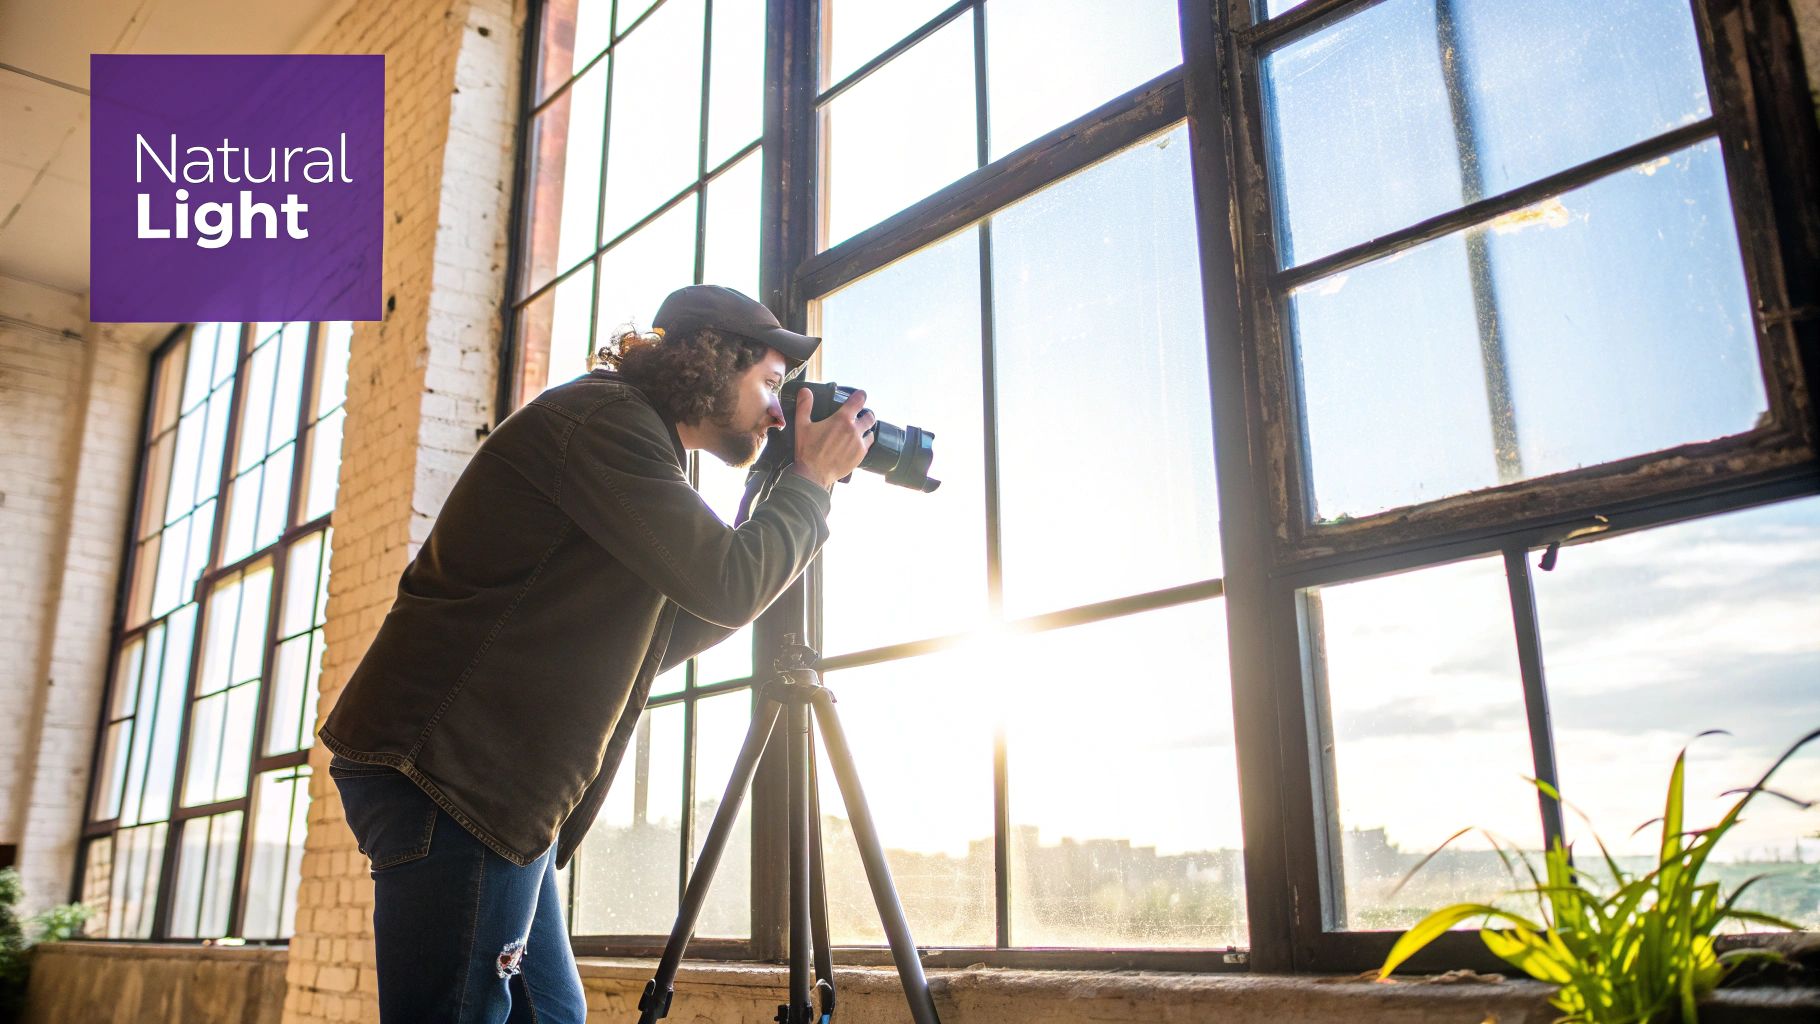
As you can see, your environment often dictates your starting point, whether that's learning to control artificial light indoors or mastering natural light on location.
Key Specifications to Understand
Once you know whether you need a strobe or a continuous light, you'll run into a wall of technical specs. Don't get overwhelmed. Only a few of these numbers really matter for the quality of your work.
The most critical spec, especially for continuous lights, is the Color Rendering Index (CRI). This tells you how accurately a light source shows the true colors of an object compared to natural daylight. You should be looking for a CRI of 95+, period. Anything less can introduce weird color casts, making skin tones look sickly or product colors appear "off." Trust me, that's a nightmare you don't want to deal with in post-production.
The demand for quality gear is real. The global photography lighting equipment market was valued at a massive $49.82 billion in 2023 and is only expected to grow, with LED technology at the forefront. Discover more insights about the photography lighting market trends. This just shows how much professionals rely on dependable, high-quality light.
Pro Tip: When you're just starting out, pour your budget into one fantastic light and one high-quality modifier. Seriously. Don't buy a cheap kit with three mediocre lights. A single, beautifully modified light source is far more versatile and will teach you more about shaping light than a complicated but subpar setup ever will.
Shaping Light with Essential Modifiers
Once you've got a dependable light source, the real artistry begins. Modifiers are the tools that take a harsh, raw strobe and turn it into a storytelling instrument, giving you precise control over the mood and feel of your images. A bare flash is like a firehose of light—unfocused and rarely flattering. Modifiers are the nozzles that shape that stream.
Thinking about light quality is everything. Hard light, coming from a small, direct source, carves out sharp, well-defined shadows and amps up the contrast. On the flip side, soft light, created by a large, diffused source, gives you gentle, feathered shadow edges and lower contrast. Neither is better; they’re just different emotional languages.
This is where the market for studio accessories is absolutely exploding. The professional studio lighting market is on track to hit $2.5 billion in 2025 and is projected to climb to around $4 billion by 2033. A huge driver for this growth is the demand for soft lighting modifiers that create more natural, flattering results, a trend that's especially strong in North America and Europe. You can read the full research about studio lighting market growth.
The Foundation: Softboxes and Umbrellas
For anyone building out a professional lighting kit, softboxes and umbrellas are the workhorses you'll turn to again and again. They both work by making your light source effectively larger, which is the physics behind creating softer light.
- Umbrellas: These are your go-to for simplicity and speed. They're portable and set up in seconds. A shoot-through umbrella diffuses the light for a broad, soft spread, while a reflective umbrella bounces light for a more controlled, slightly crisper quality.
- Softboxes: These give you far more directional control. By trapping the light inside a box and pushing it through a diffusion panel, they stop light from spilling everywhere. That precision makes them perfect for meticulous shaping.
Think of it like this: an umbrella is a floodlight, bathing a wide area in soft, forgiving light. A softbox is more like a focused beam, letting you put that beautiful soft light exactly where you want it.
A rookie mistake is assuming all softboxes are created equal. Their shape and size radically change the light. A big, 48-inch octabox will create gorgeous, wrapping light that’s incredibly flattering for portraits, while a skinny 1x4-foot strip box is perfect for carving out defined edge lights.
Advanced Modifiers for Sculpting Light
Once you've nailed the basics, you can start bringing in modifiers that create more specific and dramatic effects. Think of these as your specialized sculpting tools for developing a signature style.
A beauty dish is a fantastic example. It lands somewhere between a softbox and a hard reflector, producing a light that's soft but with a crisp, defined edge. This unique quality makes it a favorite for fashion and portrait work because it beautifully accentuates bone structure and skin texture without being harsh.
Another game-changer is the grid. A grid is simply a honeycomb-patterned insert, made of fabric or metal, that attaches to a softbox or reflector. It doesn't soften the light, but it dramatically narrows the beam and stops it from spreading.
Here’s a real-world scenario:
- The Goal: You want a dramatic, low-key portrait. The light should only hit your subject's face, letting the background melt into total darkness.
- The Setup: You’d put a gridded softbox or a gridded beauty dish close to your subject. The grid forces the light into a tight beam, focusing it only on their face and preventing any spill onto the background. You get that moody, isolated look straight out of the camera.
From there, simple reflectors (like a white foam board) and flags (black cards or fabric) become indispensable for fine-tuning. A reflector bounces light back into the shadows to dial down the contrast, while a flag blocks light to deepen those shadows and add drama. Mastering these essential modifiers is what elevates a good lighting setup to a truly professional one.
Mastering Classic Lighting Setups
Owning the right gear is a great start, but it's only half the story. The real magic happens when you know how to use those tools to craft compelling images time and time again. This is where classic lighting patterns come in—they are the foundational recipes behind almost all professional lighting, whether you're shooting a dramatic portrait or a clean product shot.
Think of these patterns not as rigid rules, but as powerful starting points. Once you truly understand how and why they work, you can tweak and adapt them to any subject and eventually develop your own signature style. We'll kick things off with the most fundamental system in all of lighting: the three-point setup.
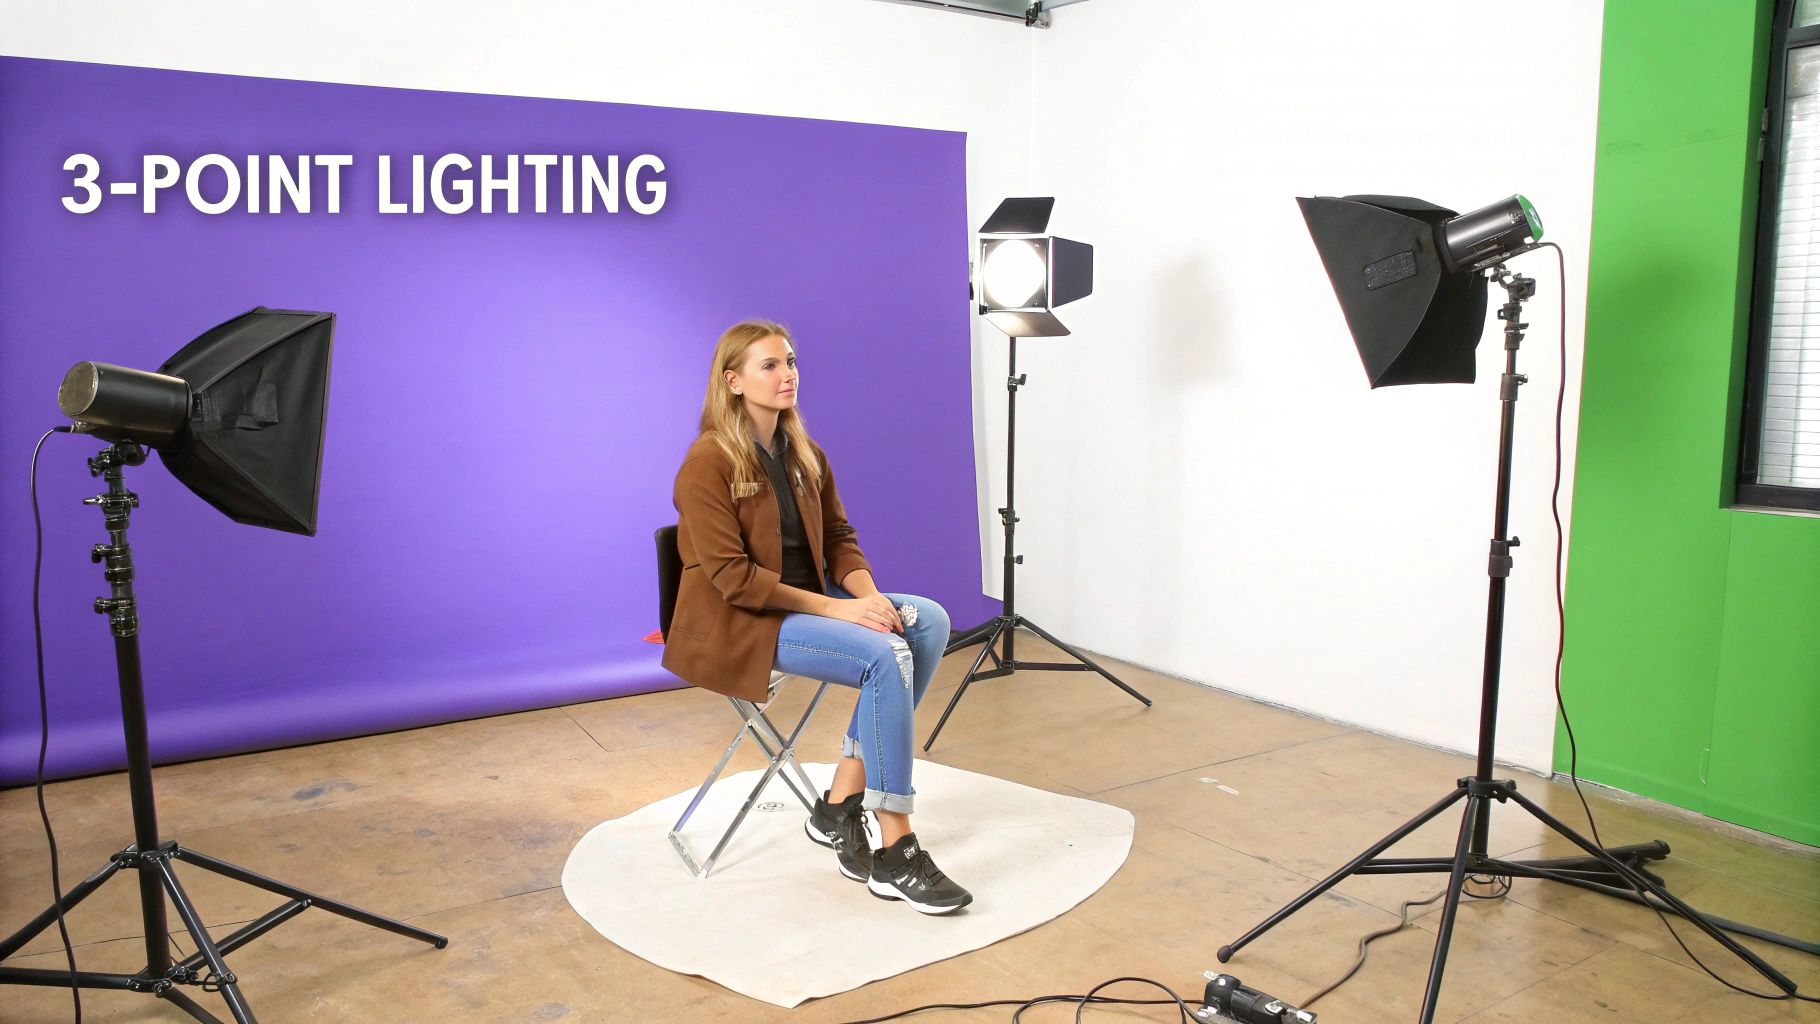
The Cornerstone Three-Point Lighting System
If you want to learn how to shape a subject with light, the three-point lighting system is your classroom. It’s a framework built on three distinct lights, each with a very specific job, that work together to create images with depth, dimension, and that tell-tale professional polish. Once you get these roles down, you can apply the logic to just about any scenario you can dream up.
Here’s a breakdown of how the three lights cooperate:
- The Key Light: This is your primary light source and the workhorse of the setup. It's the brightest light, setting the overall exposure and carving out the main highlights and shadows that give your subject form.
- The Fill Light: Placed on the opposite side of your key, this is a secondary, weaker light. Its only job is to "fill" the shadows created by the key light, which dials down the overall contrast. You’re not trying to eliminate the shadows, just soften them.
- The Backlight (or Rim Light): This one goes behind your subject, and its purpose is all about creating separation. It traces the subject's outline with a subtle highlight, making them pop right off the background and keeping the image from looking flat.
The genius of this system is all in the ratios. A powerful key light with just a whisper of fill creates a moody, high-contrast look that's perfect for dramatic portraits. On the flip side, a fill light turned up to nearly match the key light gives you a flat, even look often seen in high-key commercial work. This control is the beating heart of every professional photography lighting setup.
Real-World Example: For a standard corporate headshot, you might start with a large softbox as your key light, placing it at a 45-degree angle to your subject. To manage the shadows, you could bring in a reflector or a second, dimmed-down light on the opposite side to act as your fill. The finishing touch would be a small, gridded light placed behind the subject to create a subtle rim light on their hair and shoulders, cleanly separating them from the backdrop.
Beyond Three-Points: Essential Portrait Patterns
While three-point lighting is a complete system, many of the most iconic portrait styles are actually created with just one or two lights by mastering specific placements. These patterns are named after the signature shadow shapes they create on a person's face. Learning them is like having a visual shorthand for producing specific moods on demand.
Loop Lighting: This is one of the most common and universally flattering patterns you can learn. To get this look, place your key light just above eye level and about 30-45 degrees to the side of your camera. This creates a small "loop" of shadow from the nose that points down toward the corner of the mouth. It's a go-to for a reason—it adds dimension without being overly dramatic.
Rembrandt Lighting: Named for the master painter himself, this pattern is much more dramatic. You'll know it by the small, inverted triangle of light on the cheek opposite the key light. To create it, you need to move your key light further to the side and higher up than you would for loop lighting. The result is a moody, painterly quality that adds a real sense of gravitas to a portrait.
Butterfly Lighting (or Paramount Lighting): This is a classic glamour lighting pattern, straight out of Old Hollywood. The key light is placed high above and directly in front of the subject, aimed down. This creates a small, symmetrical, butterfly-shaped shadow right under the nose. It's incredibly flattering for sculpting cheekbones and is often paired with a reflector placed just below the chin to bounce light back up and soften any shadows.
This table breaks down how small shifts in your light's position can produce these classic looks.
| Lighting Pattern | Key Light Position | Shadow Created | Common Mood |
|---|---|---|---|
| Loop Lighting | 30-45° to the side, slightly above eye level. | Small nose shadow "looping" toward the mouth. | Flattering, versatile, professional. |
| Rembrandt | 45-60° to the side, angled high. | Triangle of light on the far cheek. | Dramatic, moody, classic. |
| Butterfly | Directly in front, high above the subject. | Symmetrical shadow directly under the nose. | Glamorous, sculpting, elegant. |
Mastering these patterns is what elevates you from someone who simply lights a subject to someone who intentionally sculpts them with light. They give you a reliable playbook you can call on to build a professional photography lighting setup that delivers predictable, high-quality results every single time. Get in there and experiment—you'll be amazed at how the smallest tweak in a light's height or angle can completely transform the mood of your image.
Syncing Your Camera and Lights for Perfect Exposure
An incredible professional lighting setup is just potential energy until you tell your camera exactly how to capture its magic. Your camera settings are the crucial bridge between the light you’ve so carefully shaped and the final image you create.
When you bring strobes into the mix, the classic rules of the exposure triangle—ISO, aperture, and shutter speed—get a major shake-up. Understanding this shift is what separates a frustrating guessing game from intentional, professional results.
In natural light, all three settings work together to control brightness. But in a studio with flash, their jobs become highly specialized. It's a completely different way of thinking, but once it clicks, you'll feel like you've unlocked a superpower.
Think of it like this: your aperture dials in the amount of flash hitting your subject, while your shutter speed manages the ambient light in the background. Mastering this simple distinction is the key to nailing your exposures every single time.
Taming the Exposure Triangle for Flash
Let's get practical. Imagine you’re in a dimly lit studio, ready to shoot a portrait with a strobe and a big octabox. Where do you start?
First, set your camera to its base ISO, which is usually 100 or 200. This gives you the cleanest possible image with virtually no digital noise. For studio work, you'll want to keep this setting locked in.
Next up is your aperture. A wide aperture like f/2.8 will let in a ton of the flash's power, giving you a bright exposure on your subject and that creamy, shallow depth of field. On the other hand, a narrow aperture like f/8 will let in far less flash, meaning you'll need to crank up your strobe's power to get the same exposure.
This relationship is everything. Aperture is your main control for the brightness of your flash-lit subject. If your subject looks too dark, you have two choices: open up your aperture or increase the power on your strobe. Simple as that.
Now for shutter speed—this is where a lot of photographers get tripped up. When you're using strobes, your shutter speed has almost no effect on the brightness of your subject. Why? Because a flash burst is insanely fast, often just 1/1000s of a second or even quicker. As long as your shutter is open when that flash fires, it captures the whole burst of light.
So, what does shutter speed actually do? It controls the brightness of any ambient light in your scene. A fast shutter speed (like 1/200s) will kill the ambient light, making your background go completely dark. A slow shutter speed (like 1/30s) lets more of that ambient light seep in, brightening the background and revealing more of the environment.
Understanding Flash Sync Speed
This brings us to a critical technical concept in flash photography: flash sync speed. This is the absolute fastest shutter speed your camera can use while staying properly synchronized with your strobe. For most DSLR and mirrorless cameras, this speed is typically around 1/200s or 1/250s.
If you try to set your shutter speed faster than your camera's sync speed, you’ll get that dreaded black bar creeping into your image. This ugly artifact appears because the shutter curtains are moving across the sensor too fast for the flash to illuminate the entire frame at once. Always check your camera's manual for its specific sync speed and treat it as your hard upper limit.
For ultimate precision and a workflow that saves a ton of time, nothing beats a handheld light meter. Instead of the old "shoot, check, adjust, repeat" dance, a light meter measures the flash output and tells you the exact aperture needed for a perfect exposure. It’s the secret to guaranteeing shot-to-shot consistency and working like a seasoned pro.
Once you've got a handle on the foundational lighting patterns, it's time to start breaking the rules. And I mean breaking them with intention. This is the fun part, where your lighting setup stops being just a tool for getting a clean shot and starts becoming an instrument for creating mood, atmosphere, and a signature style. Think of light as paint, not just illumination.
Ready to play? A great place to start is with colored gels. These are just thin, colored plastic sheets you pop over your strobes, and they can completely transform a scene. Want to fake the cool, moody vibe of twilight? Slap a blue gel on your background light. Need to mimic that warm, dreamy golden hour glow, even when you're stuck in a windowless studio? An orange gel on a rim light will get you there.
But it’s not all about dramatic, in-your-face color. Sometimes the best effects are the most subtle. A light pink gel on your main light can give skin tones a beautiful, healthy glow. A pale blue can introduce a more somber, almost cinematic quality to a portrait. The possibilities are truly endless.
The Art of Feathering Your Light
One of the most powerful—and surprisingly subtle—techniques in any photographer's toolkit is feathering. It's all about using the edge of your light source, not the center. You deliberately aim the brightest part of your light (the "hot spot") just past your subject, so they're lit by the softer, less intense fall-off.
Picture the cone of light coming from your softbox. Instead of pointing it dead-center at your model, you aim it slightly in front of them or just off to the side. The light that “feathers” across their face will be incredibly soft with a gradual, painterly transition from highlight to shadow.
Feathering is the secret ingredient behind that smooth, luminous quality of light you see in high-end magazine editorials. It dials down harsh highlights, softens skin texture, and creates a much gentler transition from light to dark than even a standard softbox setup can.
This technique is a lifesaver when you're shooting subjects with tricky, competing textures—like a model in a sequined dress and a fur coat. By feathering your key light, you can gracefully control the intensity on each surface. You’ll avoid blowing out the shiny sequins while still keeping all the rich detail in the dark fur.
Advanced Multi-Light Setups for Complex Scenes
A single light can work wonders, but let's be real—some shots just demand more firepower. This is where your understanding of a multi-light setup really shines, letting you solve creative problems and build complex, layered scenes from the ground up.
A classic challenge is getting separation in group photos. With just one key light, people in the back can easily get lost and merge into the background. A multi-light approach fixes this. A typical setup might look like this:
- One large key light: This is your workhorse, providing the main, soft illumination for the whole group.
- Two gridded rim lights: You'll place these behind and to the sides of the group. The grids keep the light focused, creating crisp edge lights on everyone's hair and shoulders. This is what pops them out from each other and the backdrop.
- One background light: Aim a separate light at the background to give it its own exposure, adding even more depth to the final image.
The demand for high-quality visuals has led to a boom in this kind of gear. The global photographic lighting equipment market is valued at around $2.343 billion as of 2025 and is still climbing. This growth is driven by both seasoned pros and a new wave of creators who need advanced tools to make their images stand out. You can read more about the photographic lighting equipment market.
Another common scenario that needs multiple lights is creating a pure, high-key white background. You can't just stick someone in front of a white wall and expect it to work. You have to light the background independently. The standard pro setup involves placing two lights behind your subject, aimed directly at the background. You’ll meter them to be at least one to two stops brighter than the key light on your subject. This completely overexposes the background, blowing it out to a clean, shadowless white—perfect for e-commerce, headshots, and clean commercial work.
Common Questions About Professional Lighting
As you start putting all this theory into practice, it's completely normal for questions to pop up. A professional lighting setup has a lot of moving parts, but you'll find the most common hurdles are much easier to clear than you might think. Let's tackle some of the most frequent questions photographers run into when they're learning to master light.
What Is the Minimum Gear I Need for a Professional Lighting Setup?
First, forget those massive, intimidating kits you see all over the internet. You can get absolutely stunning, professional results by starting with quality over quantity. In fact, a powerful one-light setup isn't just a smart way to start on a budget; it's an incredible learning tool.
Here’s your essential minimalist kit:
- One reliable strobe or high-output LED light. This is the heart of your setup, so invest in one you can truly count on.
- One sturdy light stand. Don't skimp here. A flimsy stand is just an accident waiting to happen, and nobody wants their expensive new light to take a tumble.
- One versatile, high-quality modifier. A large softbox or octabox is a fantastic first choice. It produces soft, flattering light that works for everything from portraits to products.
- One wireless trigger system. This is non-negotiable. You have to get your light off the camera to unlock any real creative possibilities.
This simple kit forces you to really understand how light works. You'll learn how to use reflectors—even a cheap white foam board from an art supply store—to bounce light and fill in shadows. It's the best way to build a rock-solid foundation before you ever think about adding more lights to the mix.
Should I Choose Strobes or Continuous LED Lights?
This is the classic fork in the road for photographers, and the right path depends entirely on what you shoot. It’s not about which one is "better," but which is the right tool for your specific job.
Strobes are the undisputed champions for most still photography. Their secret weapon is the immense power they can deliver in a split-second burst, which is exactly what you need to freeze motion or overpower bright daylight. This gives you ultimate control over your environment.
On the other hand, continuous LEDs are a must-have for hybrid shooters creating both photos and video. Their "what you see is what you get" nature makes them incredibly intuitive, since you see the light’s effect in real-time. If you only shoot portraits, fashion, or products, strobes are often the superior choice. But if video is any part of your business, modern high-power LEDs are the more practical investment.
How Do I Avoid Getting Harsh Shadows in My Photos?
Harsh, distracting shadows are almost always the result of a small, direct light source. The secret to fixing this is surprisingly simple: make your light source effectively larger and more diffused relative to your subject.
The most direct way to do this is with a modifier, like a big softbox or a shoot-through umbrella. These accessories take that concentrated beam of light from your flash and spread it out, wrapping it around your subject for gentle, flattering shadow transitions.
Another key technique is physically moving your light closer to the subject. It sounds counterintuitive, but the closer a light source is, the larger it becomes in relation to your subject. Finally, you can use a reflector or a second, low-powered fill light to bounce some illumination back into the shadows, reducing their intensity for a balanced, polished look.
What Is the Difference Between a Key Light and a Fill Light?
In any classic lighting setup, your lights have distinct roles to play. Understanding these roles is crucial for creating images with depth and dimension, rather than flat, boring ones.
The key light is your main, and usually most powerful, light source. It establishes the overall exposure and creates the defining highlights and shadows that give your subject its shape and form.
The fill light is a secondary, less powerful light source. Its only job is to "fill in" some of the dark shadows created by the key light. The goal isn't to kill the shadows entirely—that would make the image look flat and lifeless—but to soften them and control the overall contrast. A high ratio between your key and fill lights creates a dramatic, high-contrast look, while a lower ratio produces a more even, subtly-lit final photo.
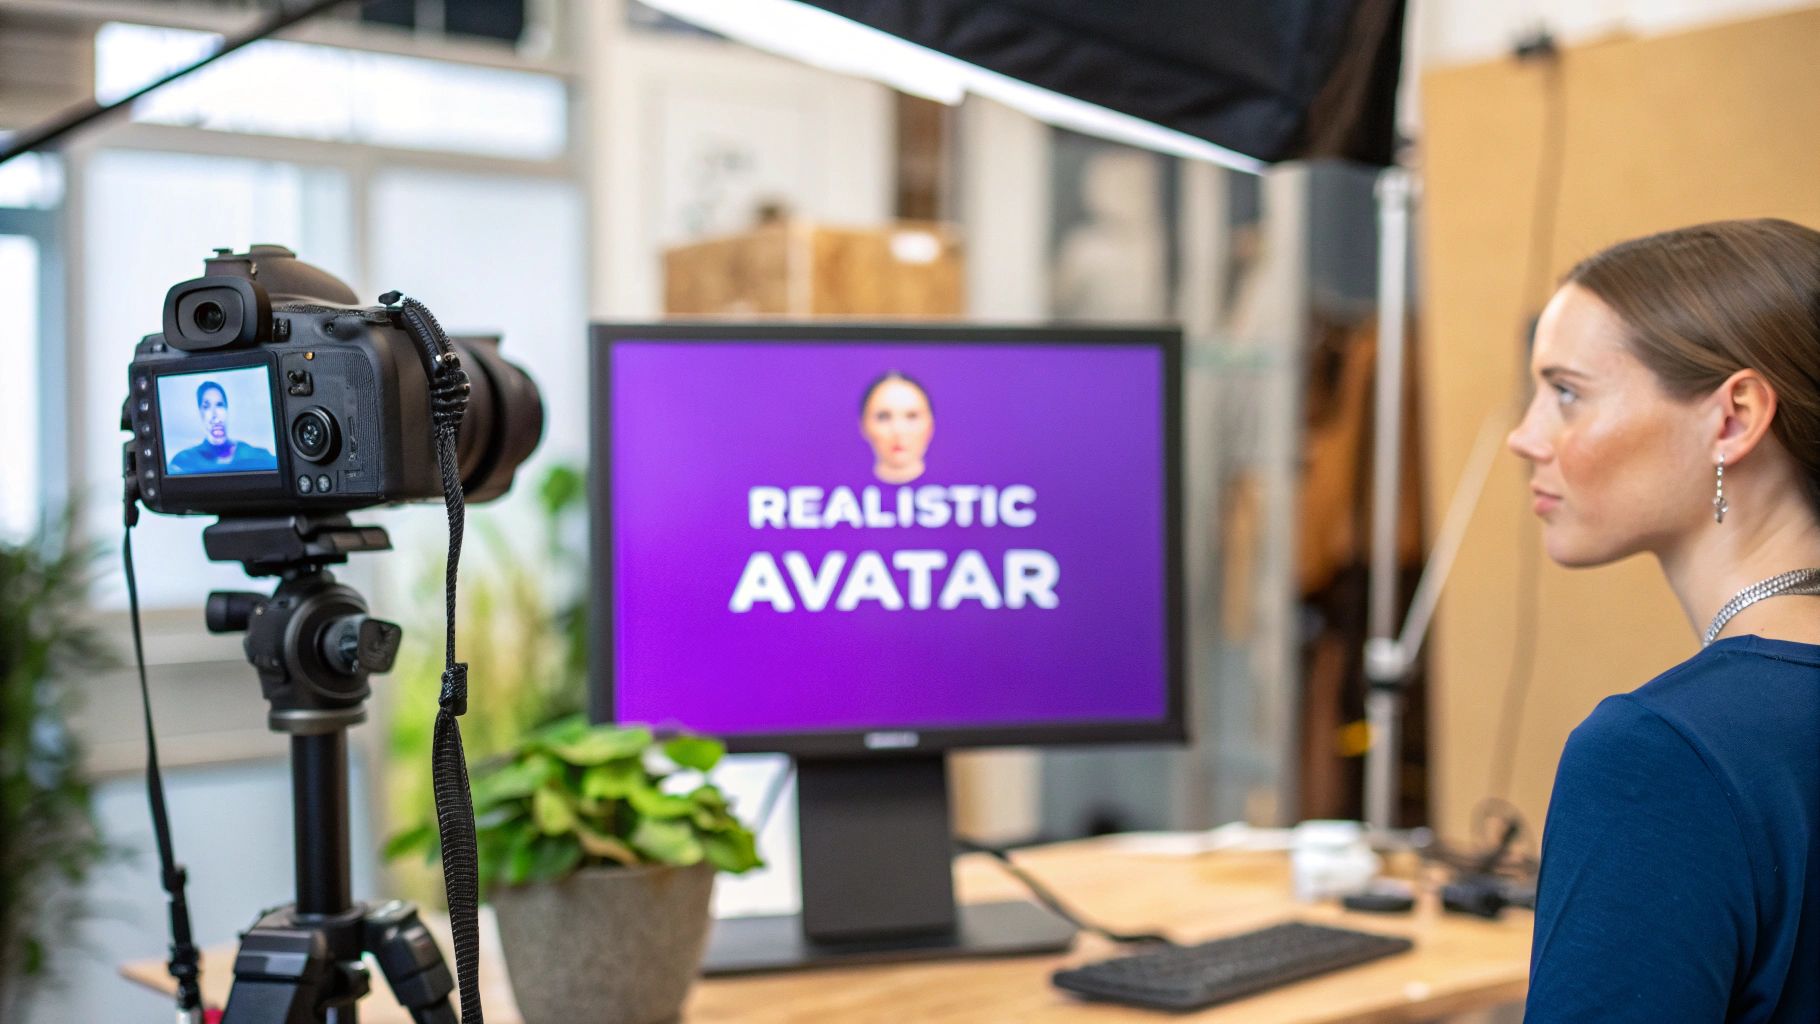
Elevating your photography with a professional lighting setup is just one piece of the puzzle. To truly stand out, your entire online presence needs to match that quality. With MakerBox, you can transform your professional profiles in seconds. Our AI-driven platform generates optimized bios, striking profile pictures, and engaging social media content, ensuring you capture the attention of clients and employers. Stop letting a weak online presence hold back your creative career. Build a profile that gets you noticed with MakerBox today.