
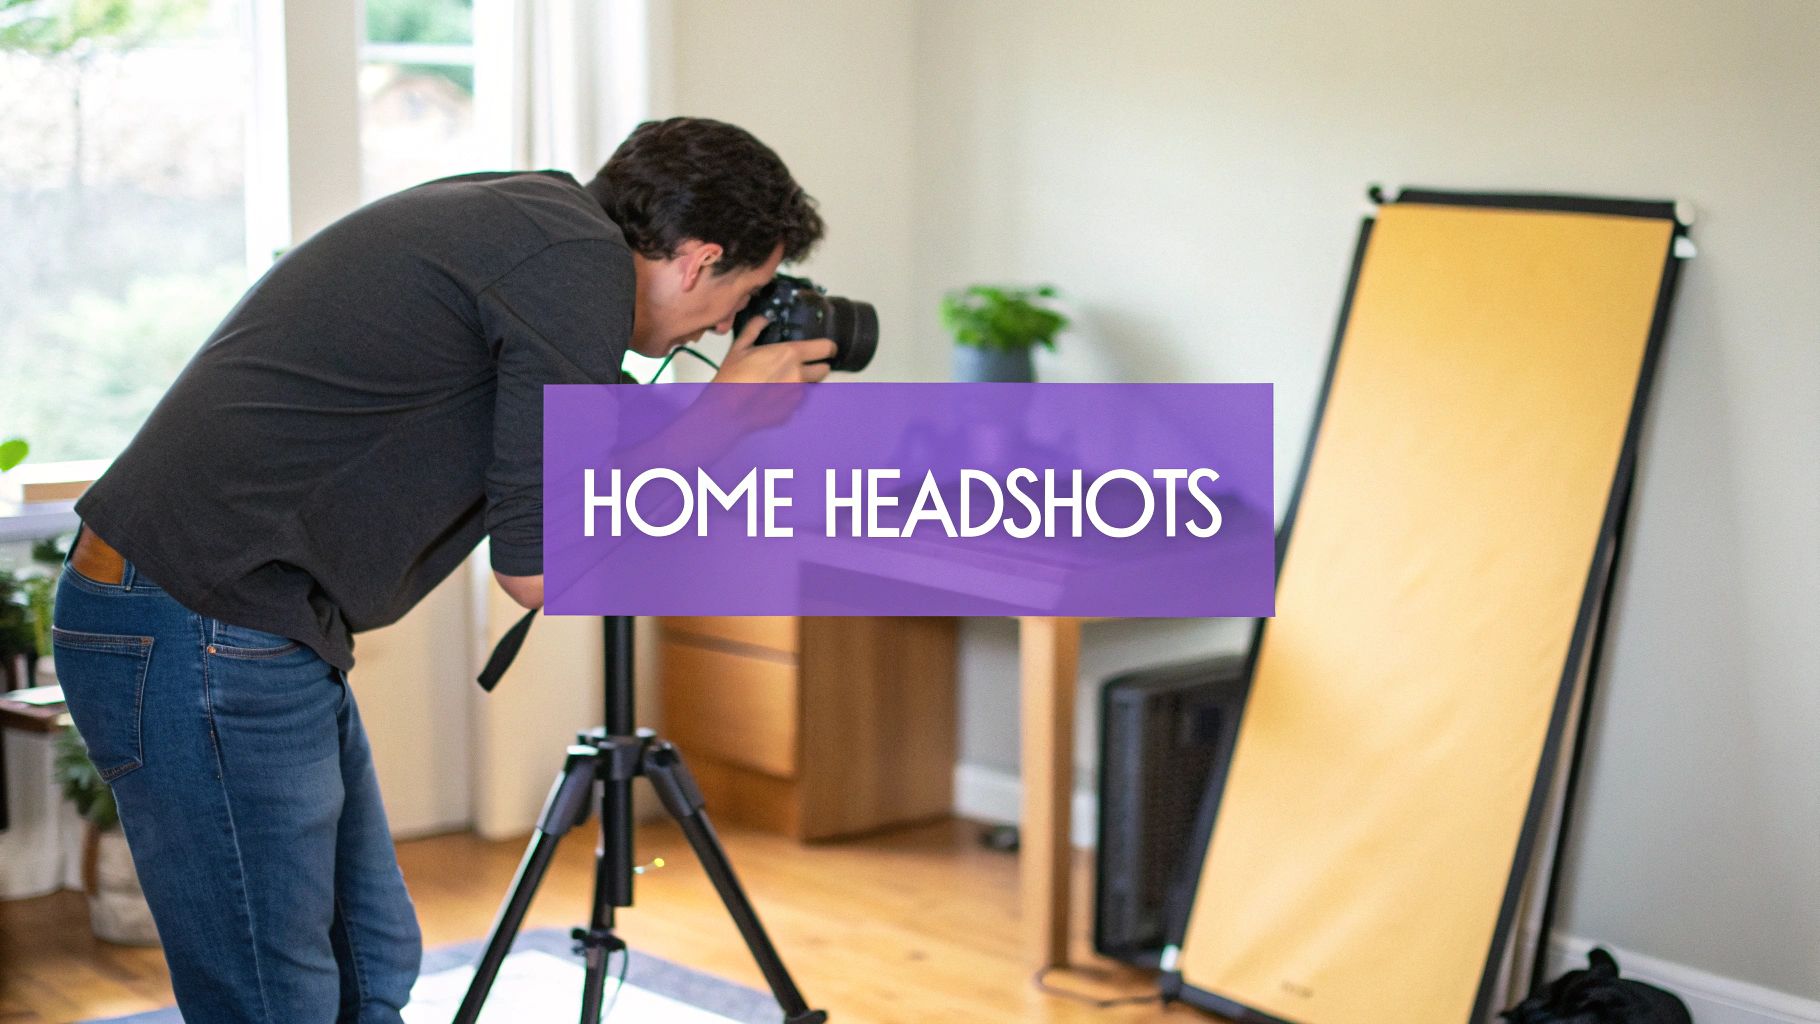
How to Take a Headshot at Home: Pro Tips with Any Camera

Taking your own headshot at home is more than possible—it's surprisingly straightforward. You just need to focus on three key things: getting the light right, finding a clean background, and using your camera smartly. Forget the expensive studio and fancy gear; a fantastic first impression is something you can definitely create yourself.
Your Headshot Is Your Digital Handshake
Think about it. Your headshot is often the first thing people see. It’s what recruiters notice on LinkedIn, what clients connect with on your website, and the image that builds a sense of trust on your social profiles. A polished, professional photo isn’t just a nice extra anymore. It’s a core piece of your personal brand.
This shift toward a strong online identity is a big deal. The global market for professional headshot services hit around USD 0.9 billion in 2024 and is expected to nearly double by 2033. With remote work and digital networking becoming the norm, a great photo has become a critical career asset. You can read more about this trend on businessresearchinsights.com.
The great news is you don’t have to spend a dime to get a killer result. Knowing how to take your own headshot gives you the power to create an image that feels both professional and genuinely you.
What Really Makes a Headshot Work?
A truly effective headshot does more than just show your face; it's a strategic tool. It needs to communicate confidence, approachability, and competence all in a single glance. Here’s what separates the good from the great:
- It actually looks like you. The photo needs to be a current and honest representation.
- Your eyes are tack-sharp. This is non-negotiable. Sharp eyes create a direct connection with the person looking at the photo.
- The lighting is soft and even. You want to avoid harsh, distracting shadows or blown-out highlights.
- The background is clean and simple. The focus should be entirely on you, not the clutter behind you.
Key Takeaway: Your headshot is your digital first impression. It should communicate professionalism and authenticity before you ever write a single word or send an email. Learning how to take a headshot at home gives you full control over this vital piece of your personal brand.
To get you started, here's a quick rundown of what you'll need to pull together a professional-looking headshot without leaving your home.
Quick Guide to Your At-Home Headshot Setup
| Element | Key Objective | Simple Solution |
|---|---|---|
| Lighting | Create soft, even light on your face | Stand facing a large window during the day |
| Background | Keep it simple and non-distracting | Use a plain, neutral-colored wall |
| Camera | Capture a sharp, high-quality image | Use a smartphone with Portrait Mode |
| Composition | Frame yourself in a compelling way | Position yourself so you fill most of the frame |
By focusing on these four elements, you're setting yourself up for a photo that looks polished, professional, and authentic.
Finding Flattering Light and a Clean Background
Two things will absolutely make or break your DIY headshot: your light and your background. Honestly, getting these right is far more important than what camera you're using. There's a reason professional photographers obsess over light—it's the secret ingredient that turns a basic snapshot into a truly compelling portrait.
Master Your Lighting Setup
The best light you can possibly find is almost always free, and you probably have it right in your home. It’s the soft, indirect light that comes from a large window. You'll want to position yourself so you are facing the window, letting that beautiful natural light fall evenly across your face. This setup instantly minimizes any harsh shadows under your eyes and nose, giving you a flattering, professional look.
Just be sure to avoid standing in direct, blazing sunlight. It'll make you squint and create some really harsh, unflattering shadows. What you're looking for is bright but soft light. A great time for this is usually mid-morning or mid-afternoon when the sun isn't directly overhead.
Here’s a quick tip that will instantly elevate your lighting game: create a DIY reflector. Just grab a piece of white poster board, a clean white t-shirt, or even a bedsheet. Hold it just out of the camera's view, below your chest, and angle it up toward your face. This little trick will bounce light back into the shadows, brightening up your chin and eyes for a much more polished photo.
This infographic breaks down a simple but incredibly effective way to set up your space for perfect headshot lighting at home.
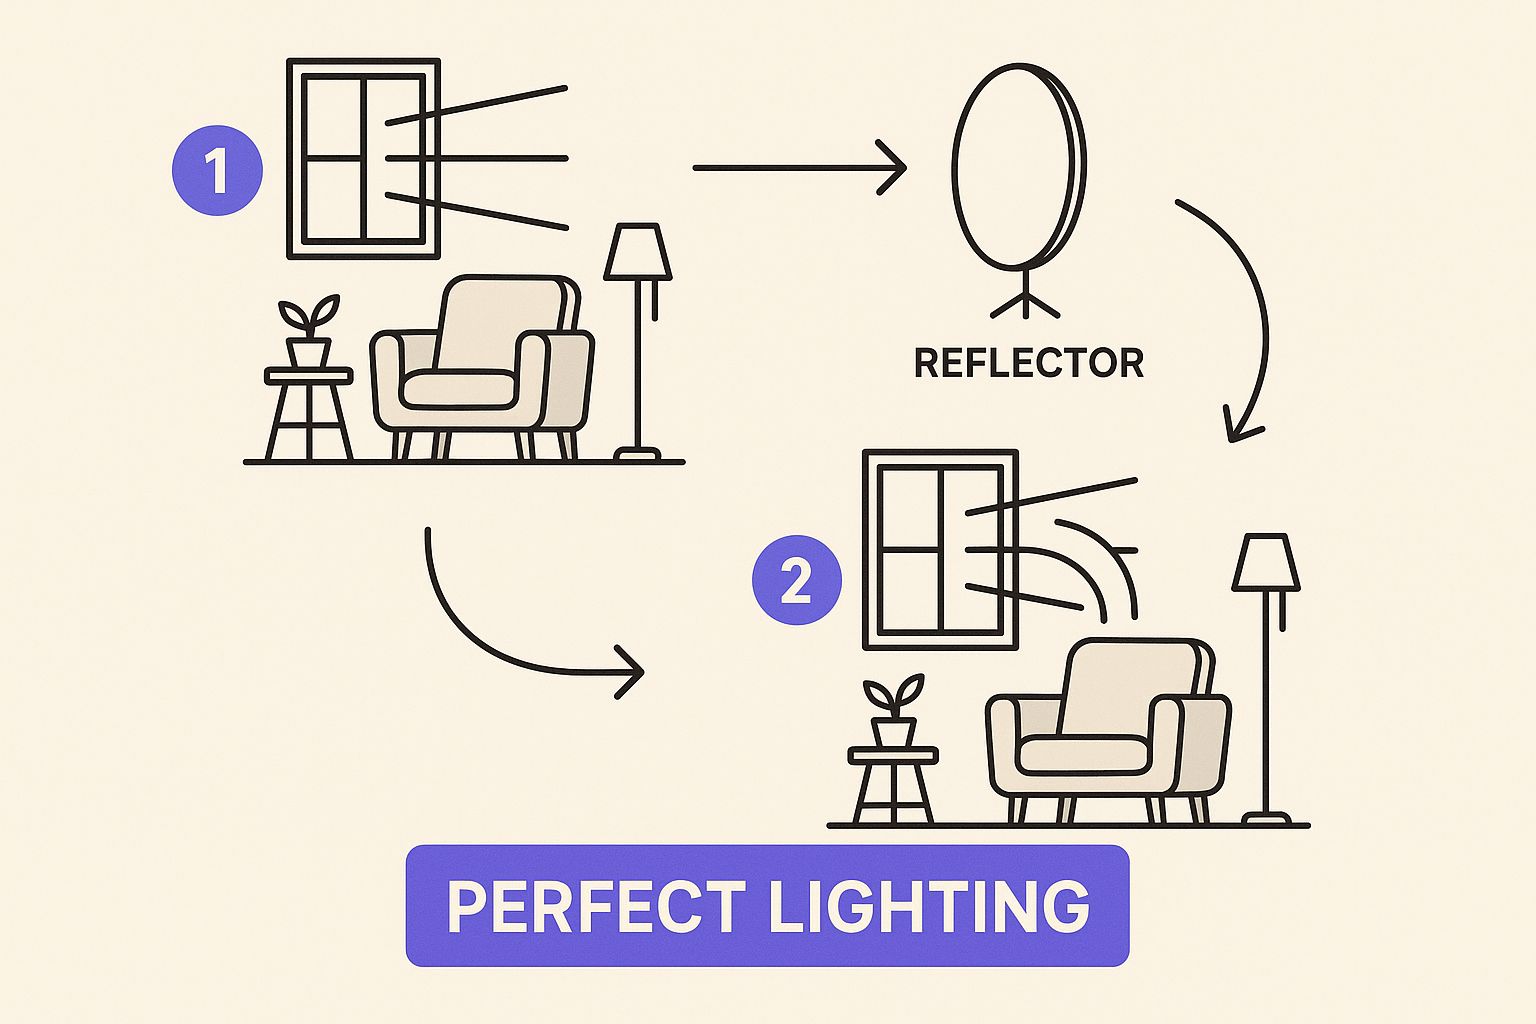
As you can see, facing a window and using a simple reflector creates that soft, even light that forms the foundation of any professional-looking photo.
Choose a Background That Puts You in Focus
Once your lighting is dialed in, it's time to think about what’s behind you. The goal for a professional headshot background is simple: it shouldn't be distracting. The focus needs to be entirely on you.
Look for a plain, neutral-colored wall in your home. Think light gray, beige, or even a clean white wall. Steer clear of any clutter, distracting artwork, or busy patterns. Remember, you are the subject, not your home decor.
Pro Tip: If you want to achieve that professional, slightly blurry background effect (known as bokeh), you need to create some distance. Don't stand with your back pressed right up against the wall. Instead, take a few big steps away from it. This separation helps the camera focus squarely on you and naturally softens whatever is behind you—a fantastic trick that works wonders, even with a smartphone's Portrait Mode.
Dialing In Your Camera Settings for Sharp Photos
You’ve got your lighting set and your background looks great. Now it’s time to talk about the camera itself. These settings are what will ultimately capture the shot, and getting them right is what separates a polished headshot from a simple snapshot.
Don't worry, you don’t need to be a technical whiz for this part. Whether you're working with a DSLR or just your smartphone, the core ideas are the same. Let's make sure your photo comes out perfectly sharp.
For DSLR or Mirrorless Cameras
If you have a camera with interchangeable lenses, find the mode dial and switch it to Aperture Priority mode. This is usually marked with an 'A' or 'Av'. This setting gives you direct control over the one thing that creates that classic headshot look: the aperture.
Your aperture dictates how much of the photo is in focus. A "wide" aperture (shown as a low f-number like f/2.8) gives you a beautifully soft, out-of-focus background that makes your face pop. On the other hand, a "narrow" aperture (a high f-number like f/11) keeps almost everything sharp, which isn't what we're going for here.
The sweet spot for a headshot is an aperture between f/2.8 and f/5.6. This range is perfect for creating that professional, blurred background while keeping your entire face—from your nose to your ears—crisp and clear.
Mastering Your Smartphone Camera
Using your phone? Your best friend here is Portrait Mode. This feature uses software to brilliantly mimic what a DSLR does, blurring the background to put the focus on you. But don't just turn it on and hope for the best. A little refinement makes all the difference.
Most phones let you adjust the intensity of the background blur in Portrait Mode. Find that slider and set it to a level that looks natural, not like a cheap filter.
Then, do this one crucial thing: tap and hold your finger on the screen right over your eye. You should see a box appear (it's often yellow), which locks both the focus and the exposure. This tells your phone that your eye is the most important part of the image, guaranteeing it stays tack-sharp.
To get the most out of your phone, remember these steps:
- Lock the Focus: This is the most important tip. Always tap and hold on your eye to lock the focus before you take the picture.
- Adjust the Blur: Play with the background blur slider until it looks subtle and professional.
- Use the Timer: Set a 3 or 10-second timer. This eliminates the camera shake that happens when you press the shutter button, and it gives you a moment to relax your face and settle into your pose.
Getting your settings right is a huge part of learning how to take a headshot at home. It’s what transforms a casual selfie into a photograph that looks like you mean business.
Of all the steps, this is where people tend to feel the most awkward. I get it. Having a camera pointed at you can feel unnatural, but the goal isn't to strike some high-fashion pose. It's about finding a comfortable position that radiates confidence and makes you look approachable. A few tiny tweaks are all it takes.
Forget the passport photo approach of facing the camera head-on. That’s a surefire way to look stiff. Instead, angle your body slightly away from the camera, then just turn your head back to face the lens. This classic trick instantly creates a more dynamic and engaging look. There's a reason pros use it—it's flattering and feels much less staged.
Find Your Best Angle
One of the most common mistakes I see in DIY headshots is a complete disregard for the jawline. Here’s an incredibly simple but effective trick: push your chin forward just a touch, then tilt it slightly down. I know, it feels a bit weird, like you're a turtle peeking out of its shell.
But trust me, this tiny movement works wonders. It defines your jawline and helps eliminate any hint of a double chin.
Expert Tip: Try thinking of it this way: gently push your forehead toward the camera. This movement naturally adjusts your chin forward and down. Give it a few tries in a mirror to see the instant sharpening effect on your facial features. It’s a small change that delivers a massive improvement.
What to Wear for Your Headshot
Your outfit is a supporting actor in this production—it should complement you, not steal the show. Solid, mid-tone colors are almost always your best bet. Think blues, greens, grays, or even a nice burgundy. These colors look great on just about everyone and keep the focus right where it should be: on your face.
There are a few wardrobe choices you'll want to avoid:
- Busy Patterns: Loud stripes, complex florals, or other distracting patterns can pull the eye away from your face and sometimes create a weird distortion on camera.
- Bright Whites or Stark Blacks: Pure white can blow out the highlights in a photo, losing all detail. Solid black can be tricky too, especially with a dark background—you risk looking like a floating head.
- Logos and Graphics: You want to brand yourself, not a clothing company. Steer clear of any prominent logos or text.
At the end of the day, wear something that fits well and makes you feel confident. When you feel good, it shows. An authentic, relaxed expression combined with smart posing is the secret sauce for a headshot you'll be genuinely proud to share.
Editing Your Headshot for a Polished Finish
Taking the photo is really just the first step. What comes next—a few simple, strategic edits—is what can turn a good photo into a great one. We’re not talking about heavy-handed alterations or making you look like a different person. This is all about subtle enhancements that give your at-home headshot a clean, professional finish.
The goal is always to look like the best version of yourself, not an airbrushed cartoon. Luckily, you don’t need expensive software. Powerful and free apps like Lightroom Mobile or Snapseed are more than enough to handle these final touches.
Your Simple Editing Checklist
You don't need to be a photo editing guru to get this right. Just focus on four key adjustments to make your photo pop. Think of it as a final quality check before you share your new headshot with the world.
- Crop for Impact: Frame your shot tightly to draw attention where it matters most—your face. A good rule of thumb is to crop from the mid-chest up, leaving just a little bit of breathing room above your head. This creates a powerful, immediate connection with the viewer.
- Adjust Brightness and Contrast: Is the photo a little on the dark side? Gently nudge the brightness slider up. Then, add a touch of contrast. This will make the details sharper and keep the image from looking washed out or flat.
- Correct White Balance: If your skin tone looks a little too orange or blue, your camera’s white balance was likely off. Look for the "temperature" or "white balance" tool and adjust it until your skin looks natural and true-to-life.
- Add a Touch of Sharpness: A slight boost in sharpness can make your eyes and other key features look wonderfully crisp and clear. Just be careful not to overdo it, as too much sharpening can make the photo look grainy and unnatural.
This final editing step is what separates a casual snapshot from a deliberate, professional image. The aim is always enhancement, not transformation, ensuring your final headshot is both polished and authentic.
The rise of virtual networking has spurred a massive shift toward accessible, high-quality home photography solutions. This trend reflects evolving preferences for flexibility and cost-effectiveness, aligning perfectly with the increasing power of smartphone cameras and user-friendly editing tools. You can discover more about this market shift on globalmarketstatistics.com. Following a consistent editing process ensures your headshot meets today’s professional standards.
Of course, even with the best guide, a few questions always pop up. It’s totally normal when you’re trying something new, and taking your own headshots is no exception. Let's walk through some of the most common hurdles I see people run into.
One of the biggest questions I get is about gear. "Can I really get a professional-looking shot with just my smartphone?" The answer is a resounding yes. Modern phone cameras, especially with features like Portrait Mode, are incredibly powerful. Your success hinges less on the camera itself and more on how well you control the lighting and background.
Another frequent worry is dealing with less-than-ideal natural light. What if your place doesn't have a big, bright window? No problem—you can create your own soft light. Just grab a lamp with a white or off-white shade and position it to your side, slightly in front of you. If the light still feels too harsh, carefully drape a thin white t-shirt over the shade to diffuse it. Just be smart about it and make sure the fabric isn't touching the hot bulb.
How Do I Avoid the "Selfie Look"?
This is the big one. How do you snap the picture without it screaming "selfie"? The trick is to get the camera out of your hand. A small tripod is perfect for this, but you can just as easily prop your phone up on a steady stack of books.
Next, you'll want to use your camera’s self-timer. Set it for 3 or 10 seconds. This little trick is an absolute game-changer. It gives you a moment to relax your shoulders, fix your posture, and settle into a natural expression. It completely eliminates the dreaded "selfie arm" and lets you compose a much more professional shot.
This kind of accessibility is why photography skills are more in demand than ever. In fact, employment for photographers is projected to grow 17% from 2022 to 2032, largely because everyone needs quality images for online profiles and personal branding. You can read more about the growing photography market on verifiedmarketreports.com.
With these simple troubleshooting tips, you’re well on your way to getting studio-quality results without the professional price tag.
Ready to elevate your entire online presence in just 30 seconds? MakerBox uses AI to generate optimized profile photos, bios, and content that gets you noticed. Transform your personal brand and see real results. Discover how MakerBox can supercharge your career or business today at https://www.makerbox.io.