Create a Realistic Avatar with AI

To create a truly realistic avatar, you need two things: a great source photo and a powerful AI tool. The magic happens when you pair a clear, front-facing image with detailed text prompts that spell out photorealistic qualities—think specific lighting, skin textures, and even subtle imperfections. This is how you guide the AI from a simple render to a lifelike result.
The Art and Science of AI Avatars
A realistic AI avatar is way more than just a new profile picture; it's a sophisticated digital extension of you. Think of it as a powerful asset for professionals building a strong personal brand, creators who need a consistent online look, or really anyone who wants a polished digital identity. These avatars bridge the gap between a static photograph and a dynamic digital persona, letting you show up professionally and creatively across different platforms without needing a new photoshoot every other week.
But creating a great avatar isn't as simple as clicking a button. It’s a mix of artistic direction and getting the technical details right. To get the best results, you need to understand a few core principles that steer the AI's output.
Why Realism Matters
A photorealistic avatar builds instant trust and connection. When people see a digital version of you that looks authentically human, they’re much more likely to engage with your content, trust your professional profile, and remember your personal brand. This is a huge deal for anyone trying to stand out. You can learn more about building a cohesive online identity in our guide on what personal branding is. The goal is to create an image that feels both aspirational and authentic.
The best AI avatars feel like an elevated version of reality, not a departure from it. They capture your essence while presenting the most professional, polished version of you.
From Mo-Cap to AI Prompts
The push for realistic digital humans isn't new. The groundwork was laid over decades with advancements in motion capture and CGI—just look at how digital characters in movies have evolved. Today’s AI avatar generators stand on the shoulders of that legacy, making incredibly sophisticated technology accessible to everyone. Instead of needing complex studios, we now use detailed text prompts and smart settings to get stunning results in minutes. A great place to start your journey is with a dedicated resource like the Your AI Avatar tool.
Choosing Your Foundation Image
Your journey to a realistic avatar doesn't start with a clever prompt. It begins the moment you select your source image. Think of this photo as the blueprint for your digital self—a high-quality plan leads to a stunning result, while a flawed one builds a shaky foundation from the start.
This photo is the single most important piece of information you'll give the AI. It meticulously analyzes every pixel to understand your facial structure, unique features, and overall likeness. A clean, well-lit image gives it the best possible data to work with, which drastically improves your chances of getting a photorealistic avatar on the first try.

Key Elements of a Great Source Photo
To give the AI everything it needs, you need to nail three core areas: lighting, pose, and background. Getting any of these wrong can confuse the AI, leading to weird artifacts or that dreaded "uncanny valley" effect.
- Lighting: Soft, even lighting is absolutely non-negotiable. If you have harsh shadows from direct sun or a harsh overhead light, the AI might misinterpret the shape of your face. A simple trick is to take a photo facing a window on a cloudy day—it’s often perfect. For a deeper dive, check out our guide on setting up a professional photography lighting setup.
- Pose and Expression: Face the camera directly and keep your expression neutral. A big smile is great for a family photo, but for this, a neutral look or a very subtle smile gives the AI a more versatile base to build from. Head tilts, artsy angles, or even hair covering parts of your face can throw off the final generation.
- Background and Attire: Keep it simple. A plain, uncluttered background is best, as busy patterns or objects can distract the AI. The same goes for your clothes—wear a simple, solid-colored shirt. I've seen complex patterns on clothing bleed into the generated avatar’s skin or hair, and it's not a good look.
A great source image is high-resolution, front-facing, and evenly lit. Anything less is a gamble that forces the AI to guess, often with disappointing results.
Technical Specifications for Success
Beyond the creative side of things, the technical specs of your photo are a huge deal. A low-resolution image just doesn't have enough data for the AI to create a detailed, realistic avatar. It's that simple.
You should aim for a photo that is at least 1024x1024 pixels. This gives the AI enough detail to accurately capture fine textures like your skin and hair. Bigger is always better, but consider this your minimum.
When it comes to file types, JPEG or PNG are the standards and work perfectly. Just make sure the file isn't too compressed. Heavy compression can create tiny visual artifacts that the AI might accidentally replicate in your avatar.
By starting with a clean, high-resolution image, you're setting the stage for a seriously impressive and lifelike digital persona.
Mastering Prompts for Photorealism
Your source image lays the groundwork, but the prompt is where the magic really happens. It's your creative command, the director's call that transforms a good photo into a hyper-realistic digital persona. Think of it like giving a professional photographer a detailed brief versus just telling them to "take a picture." One gets you a decent shot; the other gets you exactly what you envisioned.
Simply prompting "photo of a man" just won't cut it. The secret to true photorealism is layering descriptive keywords that tell the AI about specific elements like lighting, skin texture, and even the type of camera you want it to mimic. This is what pushes the AI beyond a generic render into something that feels genuinely human.
The Anatomy of a Powerful Prompt
A killer prompt is a cocktail of several key ingredients. You need to describe the subject, the style of the shot, the environment's lighting, and the technical camera details. When you blend these elements, you give the AI a rich set of instructions it can't misinterpret.
Let’s look at the difference in action.
- Generic Prompt: "Photo of a woman."
- Detailed Prompt: "Professional headshot of a 30-year-old woman, soft natural lighting, detailed skin, sharp focus, shot on a Sony A7 IV, 85mm lens, ultra-detailed."
The generic prompt might give you something usable, but it’s a gamble. The detailed version, on the other hand, leaves nothing to chance. It specifies everything from the mood of the lighting to the exact camera gear, locking in a much higher degree of realism. This is a fundamental technique for creating a realistic avatar that truly stands out.
Keywords That Drive Realism
Certain keywords are your secret weapon for signaling to the AI that you’re aiming for photorealism. They’re like cheat codes for getting lifelike results. For a deeper dive into prompt construction, our guide to the best AI profile picture generator is packed with more examples and strategies.
To give you a head start, here are some of the most impactful terms you can sprinkle into your prompts:
- For Texture: "ultra-detailed skin texture," "intricate details," "sharp focus."
- For Lighting: "cinematic lighting," "soft natural lighting," "volumetric lighting."
- For Quality: "8k," "photorealistic," "hyperrealistic," "Unreal Engine."
- For Camera Style: "shot on Sony A7 IV," "85mm lens," "f/1.8 aperture."
The table below breaks down some of the most powerful keywords and explains the effect they have on the final image.
Essential Keywords for Realistic AI Avatars
| Keyword/Phrase | Effect on Avatar | When to Use |
|---|---|---|
| ultra-detailed skin texture | Adds realistic pores, fine lines, and imperfections. | When you want to avoid an overly smooth, "airbrushed" look. |
| cinematic lighting | Creates dramatic, high-contrast lighting with deep shadows. | For professional headshots or artistic avatars with a moody vibe. |
| 8k, photorealistic | Instructs the AI to render at the highest possible quality. | Always include these for the most lifelike and crisp results. |
| shot on Sony A7 IV, 85mm lens | Mimics the specific look of high-end portrait photography gear. | To achieve a creamy, blurred background (bokeh) and professional quality. |
| Unreal Engine | Borrows rendering styles from hyper-realistic video games. | When aiming for a modern, high-fidelity digital look. |
By mastering these terms, you're essentially speaking the AI's language and leaving less room for error.
You don't need to be a photographer to use camera-specific prompts. Adding a camera model and lens type tricks the AI into replicating the unique visual qualities of that gear, like its specific depth of field and color science.
This entire process has become incredibly efficient. Advances in AI and machine learning have slashed the time it takes to create realistic avatars from weeks down to just a few minutes. Technologies like Generative Adversarial Networks (GANs) can now produce faces that are indistinguishable from real photos over 95% of the time.
By getting comfortable with descriptive prompts, you gain precise control over the final image. This ensures your avatar has the authenticity and professional quality you're after. Don't be afraid to experiment—mix and match these terms to discover what works best for your photo.
Fine-Tuning Your AI Generator Settings
A powerful prompt is your creative director, but the technical settings are your control panel. These sliders and values are what truly separate a decent attempt from a professional-grade avatar. When you get these right, you can dictate exactly how the AI interprets your instructions, saving you from endless rounds of trial and error.
Think of it this way: your prompt is the script, but the settings are the camera, lighting, and directorial choices. They have to work together. If you ignore the settings, you're leaving the final look of your avatar entirely up to chance, which almost always leads to frustrating and inconsistent results.
Demystifying Core AI Parameters
Most AI image tools share a few critical settings. Getting a handle on what they do is essential if you're aiming for photorealism.
- CFG Scale (Classifier-Free Guidance): This dial controls how strictly the AI sticks to your prompt. A higher value (think 7-10) forces the AI to follow your text very closely, which is exactly what you want for photorealism. A lower value (3-6) gives the AI more creative freedom, often pushing the image toward something more artistic or abstract.
- Sampling Steps: This number tells the AI how many times to refine the image before it's done. More steps generally lead to more detail, but you'll hit a point of diminishing returns. For a realistic avatar, a range of 25-50 steps is usually the sweet spot for great quality without waiting forever.
- Seed: The seed is just a number that kicks off the AI's random generation process. Here's the magic trick: using the same seed with the same prompt and settings will produce the exact same image every time. This is a game-changer for making small, iterative tweaks to your prompt while keeping the overall composition locked in.
This infographic breaks down how all the pieces of a great prompt come together, from the base image all the way to the stylistic details.
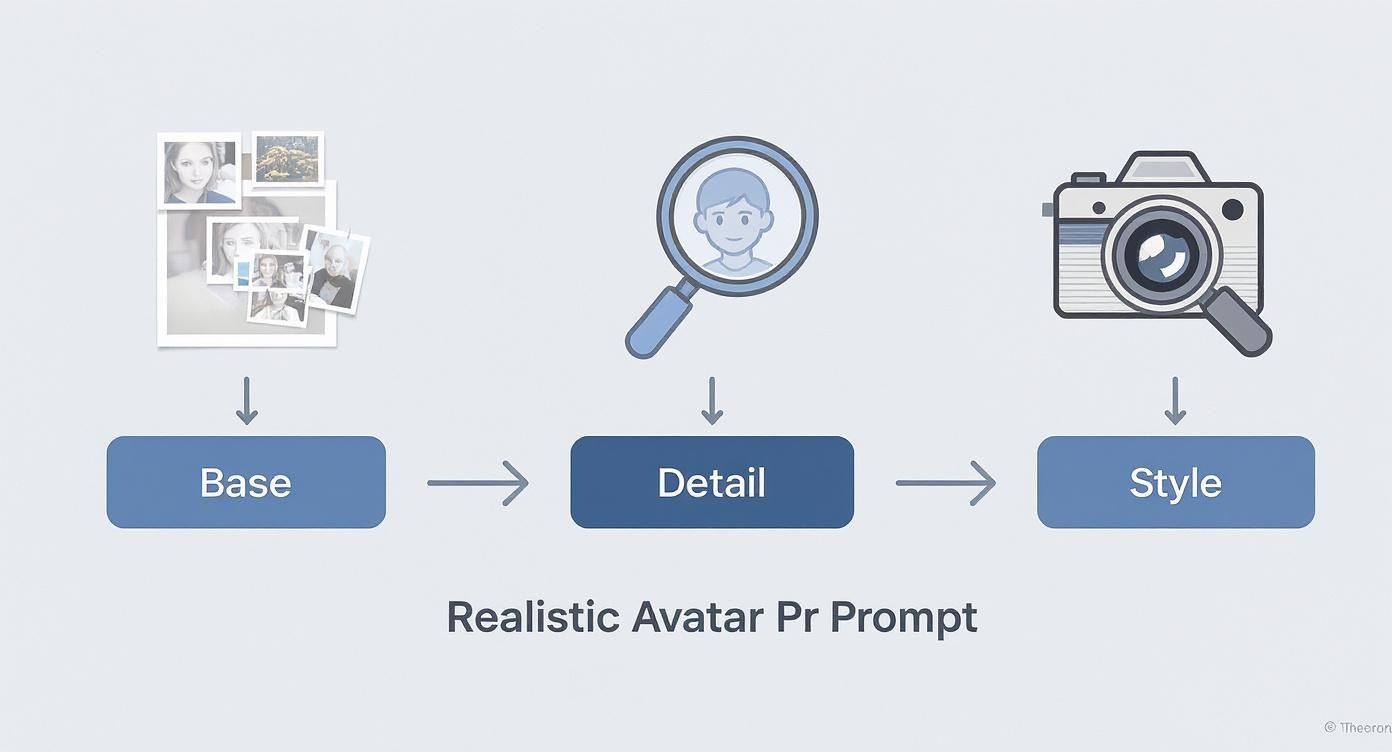
The flow from the base, to the details, to the final style shows how each layer of your prompt adds a new level of specificity, nudging the AI closer to that perfect, realistic final image.
Finding Your Perfect Configuration
There's no single "perfect" configuration; the ideal setup really depends on your source image and what you're trying to achieve. I'd suggest starting with a baseline—maybe a CFG of 7, 30 steps, and a random seed. Generate an image. If it’s not quite right, only change one variable at a time.
For instance, if the image feels too painterly and not photographic enough, bump the CFG up to 8 and regenerate using the exact same seed. This methodical approach lets you isolate what's working and what isn't.
Your goal is to find that sweet spot where the AI follows your prompt closely enough for realism but retains enough creative nuance to avoid looking stiff or robotic. It's a delicate dance between control and creativity.
By systematically testing these parameters, you'll start to build an intuition for how they interact. This knowledge is priceless and applies across many of the best AI portrait generators, giving you consistent, predictable control over your creations. It's how you move beyond just generating images and start truly crafting your digital identity with precision.
Polishing Your Avatar with Post-Processing
Getting a great image from the AI is a fantastic start, but the real magic happens in post-processing. This is the final step that takes an avatar from "good" to "unbelievably realistic." It's where you smooth over the tiny imperfections and enhance the details that truly sell the final product. And you don’t need a pricey software subscription to do it—plenty of free tools have everything you need.
This final polish is what separates the pros from the amateurs. It’s all about tackling the small artifacts that AI can sometimes leave behind, like a patch of skin that’s a little too smooth or an earring that’s slightly warped. A few minutes of focused adjustments can make all the difference.
Key Edits for Maximum Impact
You don't need to spend hours editing. Focusing on a few high-impact areas will give you the most bang for your buck. These aren't complicated changes, just simple tweaks to bring out the natural-looking features of your avatar.
- Artifact Correction: Get in there and zoom in. Look for any small, unnatural details. Most editing tools have a spot healing or clone tool that works perfectly for gently blending away any strange pixels or textures the AI might have spit out.
- Lighting and Contrast: This is where you can make your avatar’s features pop. A slight bump in contrast can add depth and dimension. I also like to use a dodge tool to gently brighten the eyes, which helps make them the focal point of the image.
- Selective Sharpening: This is a pro-level trick that’s actually super easy. Don’t just sharpen the whole image—that can look harsh and fake. Instead, selectively sharpen key features like the eyes, eyebrows, and lips. This mimics how a high-quality portrait photo would look, drawing the viewer's attention right where you want it. For a deeper dive, check out our guide on AI photo editing tools.
Why This Final Step Matters So Much
This little bit of extra effort has a real, measurable impact. People connect with realism. Research has shown that avatars with accurate facial expressions can increase feelings of social presence by as much as 30%. Even though your avatar is a static image, enhancing its lifelike qualities taps into that same psychological response, making it feel more trustworthy and engaging.
Post-processing isn't about fundamentally changing your avatar. It’s about refining it. The goal is to gently erase the subtle digital fingerprints of AI generation, leaving behind a portrait that feels authentic and professional.
By putting in just a few extra minutes to polish your image, you make sure all the work you did to create a realistic avatar pays off. The end result is a polished, professional, and genuinely convincing portrait you can be proud of.
Got Questions About AI Avatars? We Have Answers
As you dive into creating a realistic avatar, you're bound to have some questions. The tech is moving fast, and it’s totally normal to wonder what’s possible, what’s ethical, and how to get killer results without tearing your hair out. Let’s clear up some of the most common questions that pop up.
Getting these out of the way will help you move past the technical stuff and get back to the fun part: crafting your digital identity.
Can I Make an Avatar from a Low-Quality Photo?
Technically, yes, you can—but you probably shouldn't. Using a low-res photo is a massive gamble. The AI needs clear, detailed data to map your facial structure, and a blurry or pixelated image forces it to fill in the blanks. The result? Almost always a soft, generic, or slightly off-looking avatar that misses what makes you, you.
For the best outcome, always start with a high-resolution source image. Think of it like a sculptor trying to create a detailed bust from a fuzzy photograph; it just won't work. The AI operates on the same principle, so a crisp, clear photo is non-negotiable if you’re serious about realism.
How Much Control Do I Really Have Over the Final Look?
You have a ton of control, but it's not a single "make it look like me" button. Your influence comes from a mix of three key things:
- The Source Image: This is your blueprint. It sets your core likeness and facial geometry.
- The Prompt: This is your creative direction. You use it to define everything from lighting and style to texture and mood.
- The Settings: These are your technical dials, letting you fine-tune how strictly the AI adheres to your prompt versus the source image.
When you get the hang of balancing all three, you can steer the final image with surprising precision. But if you neglect any one of these, you’re basically giving up a huge chunk of your control.
Will My AI Avatar Look Exactly Like Me?
The aim of a realistic avatar is to create a photorealistic version of yourself, but it’s key to have the right expectations. It’s not going to be a pixel-perfect clone of your photo. A better way to think of it is as an artistic interpretation, one that’s guided by your data and your instructions. The result should capture your likeness and essence, not be your identical twin.
Subtle differences are not only normal but often a good thing. The AI might smooth out minor blemishes or create a more flattering lighting setup than your original photo had, giving you a polished, professional version of yourself.
The best AI avatars aren't perfect copies; they're recognizable and authentic representations. They should feel like you on your best day, captured by a professional photographer.
As you start creating, the line between a generated image and a real one can get pretty blurry. As this tech becomes more widespread, it’s helpful to know the techniques to verify if a photo is real just to appreciate the craft behind it all.
Can I Use My Avatar for Commercial Purposes?
This is a big one, and the answer almost always comes down to the terms of service of whatever AI tool you're using. Most platforms have very specific rules about commercial use.
- Free or Trial Versions: These almost always restrict commercial use. They're for personal projects and experimentation only.
- Paid Subscriptions: These typically grant you a commercial license for the images you create, letting you use them for business.
Always read the fine print. Before slapping your new avatar on your business website, in marketing materials, or on monetized content, double-check that your plan allows it. That one simple check can save you from a world of legal trouble later. Don't just assume you have the rights—confirm it.
Ready to build a digital identity that opens doors? With MakerBox, you can transform a simple photo into a professional avatar and generate a complete, optimized profile for all your social networks in under a minute. Stop guessing and start growing with AI-powered precision. Get started with MakerBox today!